Testing Soil pH at Home Simple Steps
- 1.
Can I Test My Soil pH Myself? Absolutely—You Got This!
- 2.
What Is the Cheapest Way to Test Soil pH? Budget-Friendly Hacks That Actually Work
- 3.
What Household Items Can Be Used to Test pH? Your Kitchen Is a Science Lab
- 4.
Do Cheap Soil pH Testers Work? The Honest Truth About Budget Meters
- 5.
Step-by-Step Guide to Testing Soil pH at Home
- 6.
Understanding pH Results: What Do the Numbers Actually Mean?
- 7.
Common Mistakes to Avoid When Testing Soil pH
- 8.
How Often Should You Test Your Soil pH?
- 9.
Amending Soil Based on pH Results: From Test to Action
- 10.
Advanced Tips for Serious Gardeners
Table of Contents
testing soil ph at home
Can I Test My Soil pH Myself? Absolutely—You Got This!
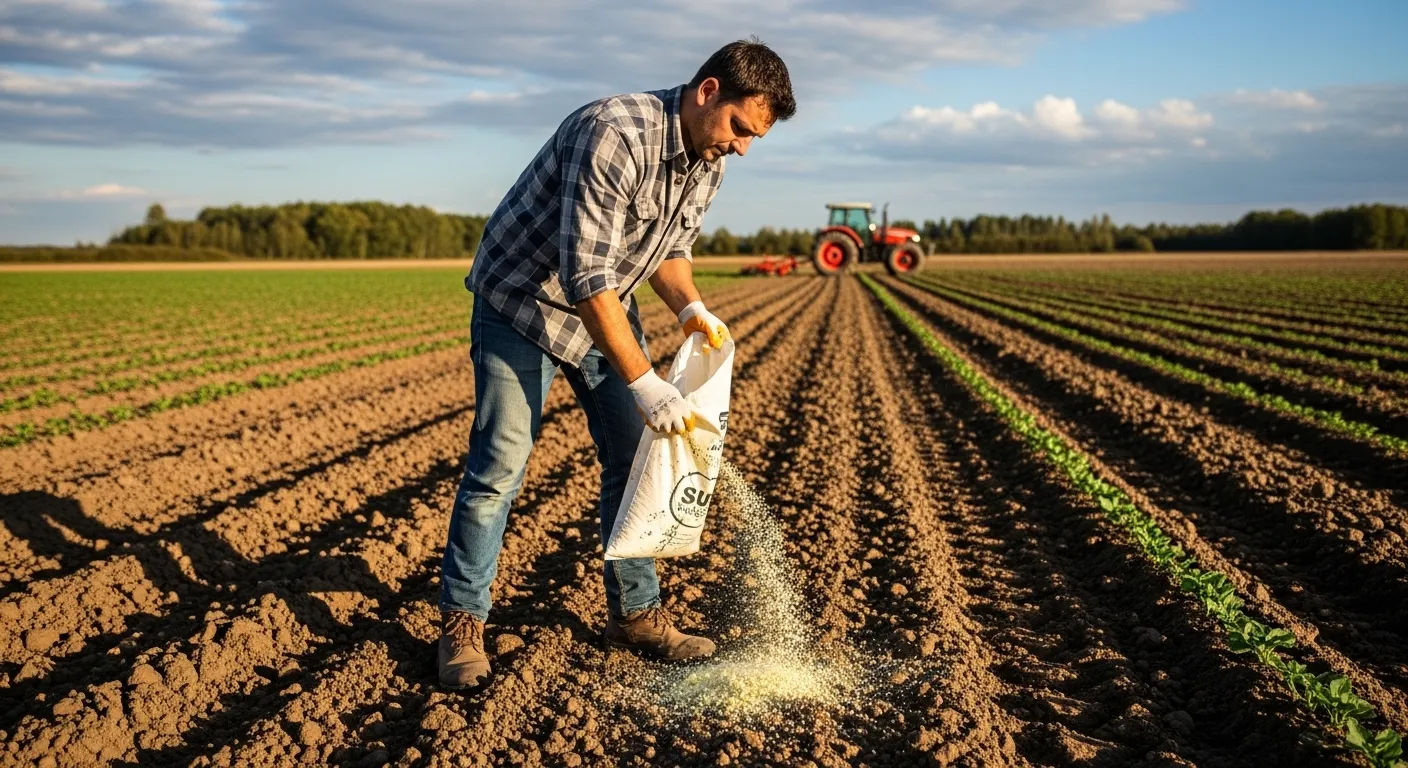
Ever looked at your sad-looking tomato plants and thought, "What in the world is wrong with you, buddy?" while secretly wondering if your soil's throwing a tantrum behind your back? Well, guess what—yes, you can absolutely test your soil pH yourself without needing a PhD in chemistry or spending your entire gardening budget on fancy equipment. Testing soil pH at home is like being a detective for your dirt, and honestly, it's way more satisfying than binge-watching crime shows (though we won't judge if you do both). The beauty of testing soil ph at home is that it puts the power right in your hands—no waiting for lab results, no complicated jargon, just you and your garden getting cozy with some simple science. Whether you're growing prize-winning roses or just trying to keep your basil alive for more than two weeks, knowing your soil's pH is the secret sauce that separates the green-thumb legends from the "why is everything dying?" crowd.
What Is the Cheapest Way to Test Soil pH? Budget-Friendly Hacks That Actually Work
Let's get real for a hot second—gardening can get expensive faster than you can say "organic heirloom tomatoes," but testing soil ph at home doesn't have to break the bank. The cheapest way? Grab some distilled water, a clean container, and either red cabbage or baking soda/vinegar from your kitchen. Yep, you read that right—your pantry holds the keys to soil enlightenment. For under $5 USD total (or free if you already have these items), you can get a rough idea of whether your soil's acidic, neutral, or alkaline. Red cabbage juice acts as a natural pH indicator—mix it with your soil sample, and the color change will tell you everything you need to know (pink = acidic, purple = neutral, blue/green = alkaline). The baking soda and vinegar method is even simpler: if your soil fizzes with vinegar, it's alkaline; if it fizzes with baking soda, it's acidic. While these DIY methods won't give you the precision of a digital meter, they're perfect for getting the general vibe of your soil's personality. When you're serious about testing soil ph at home on a budget, these kitchen chemistry tricks are your best friends.
What Household Items Can Be Used to Test pH? Your Kitchen Is a Science Lab
Who needs expensive test kits when your kitchen's basically a soil testing laboratory waiting to happen? Beyond the red cabbage and baking soda/vinegar combos we mentioned earlier, you've got several other household heroes ready to help with testing soil ph at home. Blackberry juice works similarly to red cabbage—its anthocyanins change color based on acidity. Hydrangea flowers (if you have them growing) can indicate soil pH based on their bloom color in your garden, though this is more observational than testing. Even pH test strips from your old aquarium kit can work in a pinch, though they're designed for water so you'll need to make a soil slurry first. The key is understanding that most natural pH indicators rely on anthocyanins—those magical pigments in fruits and vegetables that change color with acidity. When you're getting creative with testing soil ph at home using household items, remember that consistency matters more than perfection. Use the same amount of soil and liquid each time, let it sit for the same duration, and compare results under similar lighting conditions. Your kitchen might not be a certified lab, but it's definitely good enough for getting your garden on the right track.
Do Cheap Soil pH Testers Work? The Honest Truth About Budget Meters
Alright, let's address the elephant in the garden shed: those $10-20 USD soil pH testers you see on Amazon and at big-box stores—do they actually work, or are they just fancy paperweights that make you feel scientific? The short answer: sort of. Cheap soil pH testers can give you a ballpark figure, but they're notorious for being inconsistent and requiring frequent calibration (which most people never do). The probes on budget meters often get coated with minerals from the soil, leading to inaccurate readings after just a few uses. However, if you're just trying to determine whether your soil is generally acidic or alkaline—and you calibrate the meter properly before each use—these inexpensive tools can provide useful guidance for testing soil ph at home. The sweet spot seems to be in the $25-40 USD range, where you get better build quality and more reliable sensors without breaking the bank. Pro tip: if you do invest in a cheap meter, test the same soil sample multiple times and take an average of the readings to minimize error. And always, always clean the probe thoroughly after each use with distilled water and a soft cloth. When it comes to testing soil ph at home with budget equipment, managing expectations is key—these tools are great for trends and general guidance, but don't bet your entire harvest on their precision.
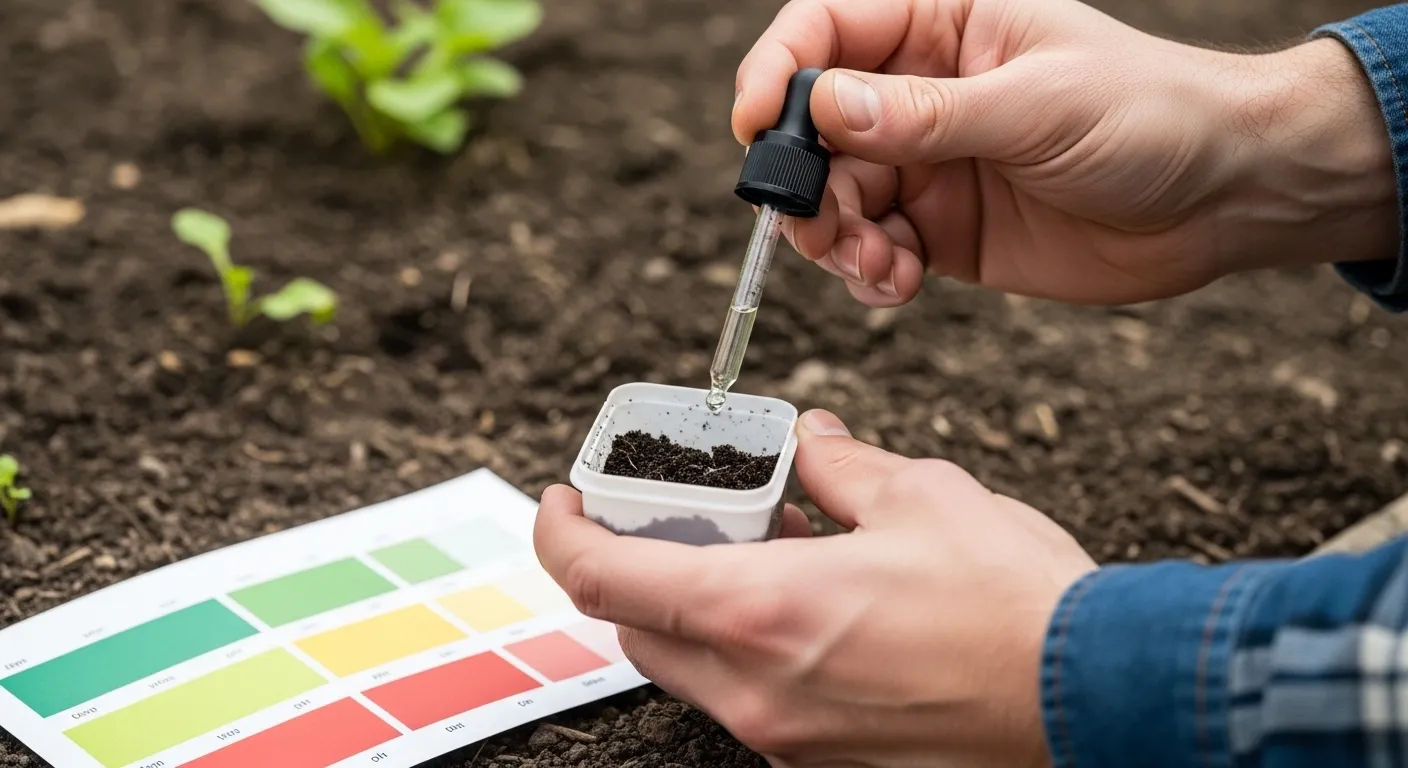
Step-by-Step Guide to Testing Soil pH at Home
Ready to get your hands dirty (literally)? Here's your foolproof roadmap for testing soil ph at home like a pro, whether you're using a DIY method or a store-bought kit. First, collect your soil sample from 6-8 inches below the surface, avoiding areas right next to compost piles or where you've recently added fertilizer. Take samples from multiple spots in your garden and mix them together in a clean container—that's your composite sample representing the whole area. Remove any rocks, roots, or debris, then let the soil air-dry for 24 hours (don't use heat, as it can alter pH). For DIY methods, mix 1 part soil with 1 part distilled water, let it sit for 30 minutes, then add your indicator (cabbage juice, etc.) and observe the color change. For test kits, follow the specific instructions but generally you'll mix soil with the provided solution and compare the resulting color to a chart. For digital meters, insert the probe directly into moist soil and wait for the reading to stabilize. Here's a quick reference table for common methods:
| Method | Cost Range | Accuracy Level | Time Required |
|---|---|---|---|
| Red Cabbage DIY | $0-5 USD | Low-Moderate | 45 minutes |
| Baking Soda/Vinegar | $0-3 USD | Low | 15 minutes |
| Chemical Test Kit | $10-25 USD | Moderate | 10 minutes |
| Digital pH Meter | $20-100 USD | Moderate-High | 5 minutes |
| Laboratory Analysis | $30-100 USD | Very High | 1-2 weeks |
Remember, the goal of testing soil ph at home isn't laboratory-grade precision—it's understanding your soil's general tendencies so you can make informed decisions about what to plant and how to amend your dirt for optimal growth.

Understanding pH Results: What Do the Numbers Actually Mean?
So you've done the test and got a number staring back at you—now what? Understanding pH results is like learning a new language, but don't worry, we'll translate. The pH scale runs from 0 to 14, with 7 being neutral (like pure water). Anything below 7 is acidic (think lemon juice or vinegar), and anything above 7 is alkaline or basic (like baking soda or soap). Most plants prefer slightly acidic soil in the 6.0-7.0 range, but some have specific preferences: blueberries and azaleas love acidic soil around 4.5-5.5, while lavender and asparagus prefer alkaline conditions around 7.0-8.0. When you're interpreting your testing soil ph at home results, think of pH as your soil's personality—it determines which nutrients are available to plants and which beneficial microbes can thrive. Acidic soil (below 6.0) tends to have more available iron, manganese, and aluminum, while alkaline soil (above 7.5) makes calcium, magnesium, and phosphorus more accessible. The key insight? It's not about achieving "perfect" pH—it's about matching your soil's natural tendencies to plants that will thrive there, or making gradual amendments if you're determined to grow something that prefers different conditions. Your pH number is just information, not a judgment on your gardening skills.
Common Mistakes to Avoid When Testing Soil pH
Let's be honest—everyone makes mistakes when they're starting out with testing soil ph at home, but some errors are more common (and more avoidable) than others. First mistake: testing soil that's too wet or too dry. Your sample should be moist like a wrung-out sponge, not soggy or bone-dry. Second mistake: testing right after adding fertilizer, lime, or other amendments—wait at least 2-3 weeks for the soil to stabilize. Third mistake: taking samples from just one spot instead of creating a composite from multiple areas. Fourth mistake: using tap water instead of distilled water for DIY tests (tap water has minerals that can throw off your results). Fifth mistake: not cleaning your tools between tests, which leads to cross-contamination. And sixth mistake (this one's important): testing at the wrong time of year. Spring and fall are ideal for testing soil ph at home because soil chemistry is more stable during these seasons. Summer heat and winter freeze-thaw cycles can temporarily alter pH readings. When you avoid these common pitfalls, your test results will be much more reliable, and you'll make better decisions about what your garden really needs.
How Often Should You Test Your Soil pH?
Here's the million-dollar question: once you've mastered testing soil ph at home, how often should you actually do it? The answer depends on what you're growing and how intensively you're gardening. For most home gardens, testing once a year is plenty—spring is ideal because it gives you time to make amendments before planting season kicks into high gear. However, if you're growing heavy feeders like tomatoes, corn, or roses that deplete soil nutrients quickly, testing twice a year (spring and fall) makes sense. Container gardens need more frequent attention—test every 3-4 months since potting mixes can change pH rapidly as they break down. If you've recently amended your soil with lime (to raise pH) or sulfur (to lower pH), wait 2-3 months before retesting to give the amendments time to work their magic. And if you notice plants struggling despite proper watering and fertilizing, that's your cue to test immediately—sometimes pH shifts are the hidden culprit behind mysterious garden problems. The beauty of testing soil ph at home is that it's cheap and easy enough to do regularly without feeling like a chore, so you can stay on top of your soil's health year after year.
Amending Soil Based on pH Results: From Test to Action
You've tested, you've got your number, and now you're wondering "what the heck do I do with this information?" Don't panic—we've got your back. If your soil is too acidic (below 6.0 for most plants), you can raise the pH by adding garden lime (calcium carbonate) or wood ash. Lime works slowly over several months, so apply it in fall for spring planting. If your soil is too alkaline (above 7.5), lower the pH by adding elemental sulfur, aluminum sulfate, or organic matter like peat moss or composted pine needles. Sulfur takes time to work (weeks to months), while aluminum sulfate acts faster but can be harsh on plants if over-applied. For container gardens, it's often easier to replace the potting mix entirely rather than trying to amend it. The golden rule of soil amendment: start small. Apply half the recommended amount, wait a few weeks, retest, and then decide if you need more. Drastic pH changes can shock plants and disrupt soil biology, so gradual adjustments are always better. When you're acting on your testing soil ph at home results, remember that soil is a living ecosystem—treat it gently, and it will reward you with healthy, vibrant plants.
Advanced Tips for Serious Gardeners
Ready to level up your testing soil ph at home game? Here are some pro tips that separate weekend warriors from soil science enthusiasts. First, keep a garden journal tracking your pH readings over time—this helps you spot trends and understand how your amendments are working. Second, test different areas of your property separately; you might have acidic soil under pine trees and alkaline soil near your foundation. Third, consider investing in a combination meter that tests pH, moisture, and light levels—all crucial factors for plant health. Fourth, learn to "read" your plants as living pH indicators: if your hydrangeas are pink, your soil is alkaline; if they're blue, it's acidic. Fifth, join a local gardening club or Master Gardener program where you can compare notes with other soil testers and learn regional quirks. And finally, don't forget that pH is just one piece of the soil health puzzle—consider testing for nitrogen, phosphorus, and potassium levels too, especially if you're growing vegetables or heavy-feeding flowers. The more you understand about your soil's chemistry, the better you can nurture the incredible ecosystem happening right under your feet. For more gardening wisdom and soil science insights, visit Potaday, explore our comprehensive Growing section, or dive into our detailed guide on High Ph In Soil Correction Tips. Happy testing, and may your soil always be just right for whatever you're growing!
Frequently Asked Questions
Can I test my soil pH myself?
Yes, you can absolutely test your soil pH yourself using several methods that range from free kitchen ingredients to affordable test kits. DIY methods like red cabbage juice or baking soda/vinegar can give you a general idea of whether your soil is acidic or alkaline, while chemical test kits ($10-25 USD) and digital meters ($20-100 USD) provide more precise readings. The process involves collecting soil samples from 6-8 inches deep, mixing them with distilled water or the provided solution, and observing color changes or digital readings. Regular testing soil ph at home empowers you to make informed decisions about plant selection and soil amendments without relying on expensive laboratory services.
What is the cheapest way to test soil pH?
The cheapest way to test soil pH is using household items you likely already have in your kitchen. Red cabbage juice acts as a natural pH indicator—mix it with your soil sample and observe the color change (pink = acidic, purple = neutral, blue/green = alkaline). The baking soda and vinegar method is even simpler and costs virtually nothing: if soil fizzes with vinegar, it's alkaline; if it fizzes with baking soda, it's acidic. These DIY approaches cost under $5 USD total and provide a general sense of your soil's acidity level, making them perfect for gardeners on a tight budget who are just starting with testing soil ph at home. While not as precise as commercial kits, these methods give you enough information to choose appropriate plants or decide if further testing is needed.
What household items can be used to test pH?
Several common household items can be used for testing soil ph at home, including red cabbage (contains anthocyanins that change color with pH), baking soda and white vinegar (react differently with acidic vs. alkaline soils), blackberry juice (similar pH-indicating properties to red cabbage), and even aquarium pH test strips if you have them lying around. The key is understanding that most natural pH indicators rely on plant pigments called anthocyanins that shift color based on acidity levels. For best results, use distilled water when mixing soil samples, maintain consistent ratios of soil to liquid, and compare color changes under good lighting. While these household methods won't give laboratory-grade precision, they provide valuable insights into your soil's general pH range at virtually no cost.
Do cheap soil pH testers work?
Cheap soil pH testers (under $20 USD) can provide general guidance for testing soil ph at home, but they have significant limitations. These budget meters often suffer from inconsistent readings, require frequent calibration that most users neglect, and have probes that get coated with soil minerals, reducing accuracy over time. However, if you calibrate properly before each use, clean the probe thoroughly after testing, and take multiple readings to calculate an average, inexpensive testers can help you determine whether your soil is generally acidic or alkaline. For more reliable results without breaking the bank, consider spending $25-40 USD on mid-range meters with better build quality and sensor technology. Remember that cheap testers are best for identifying trends and making general decisions rather than precise pH management for sensitive plants.
References
- https://www.rhs.org.uk/soil-composts-mulches/testing-your-soil
- https://extension.umn.edu/soil-testing/soil-test-interpretation
- https://www.gardeners.com/how-to/soil-ph/5120.html
- https://extension.psu.edu/testing-soil-ph